
Last updated November 21, 2026
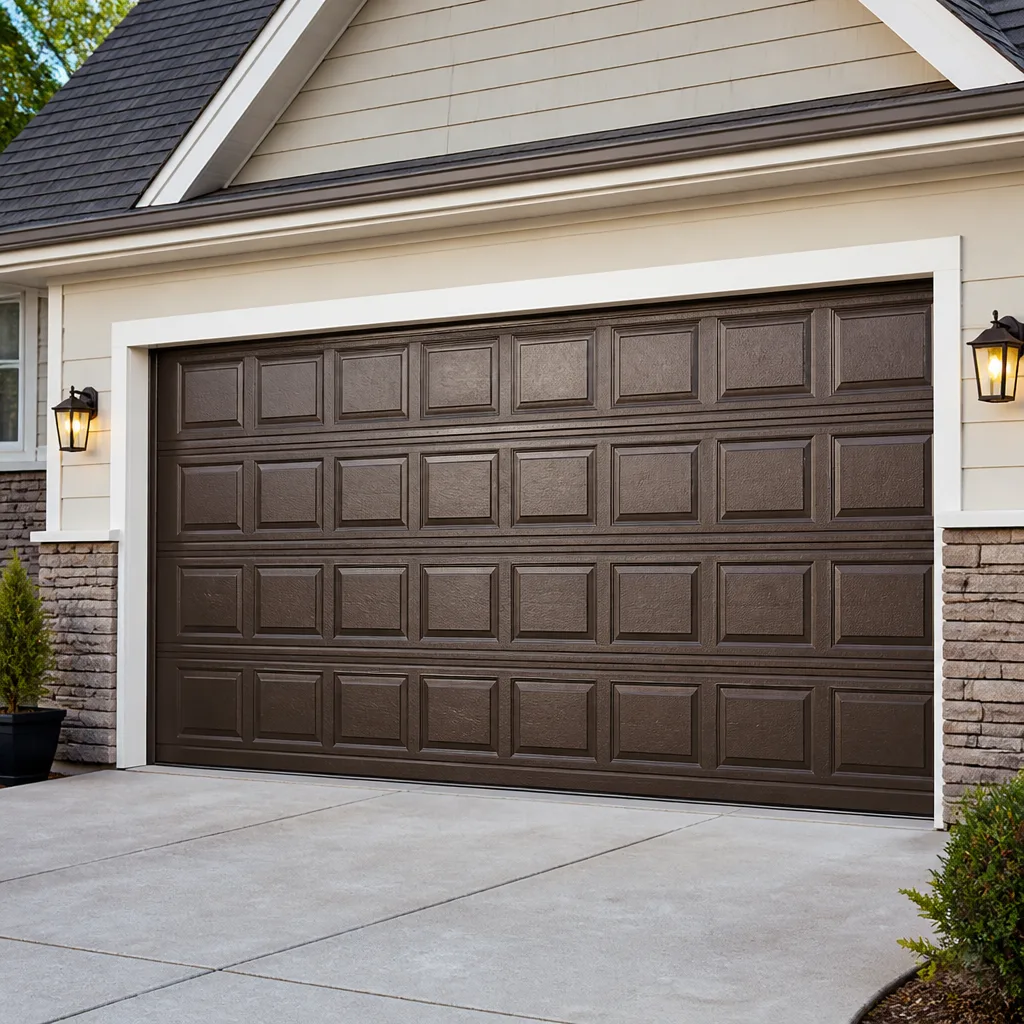 Raised-panel steel
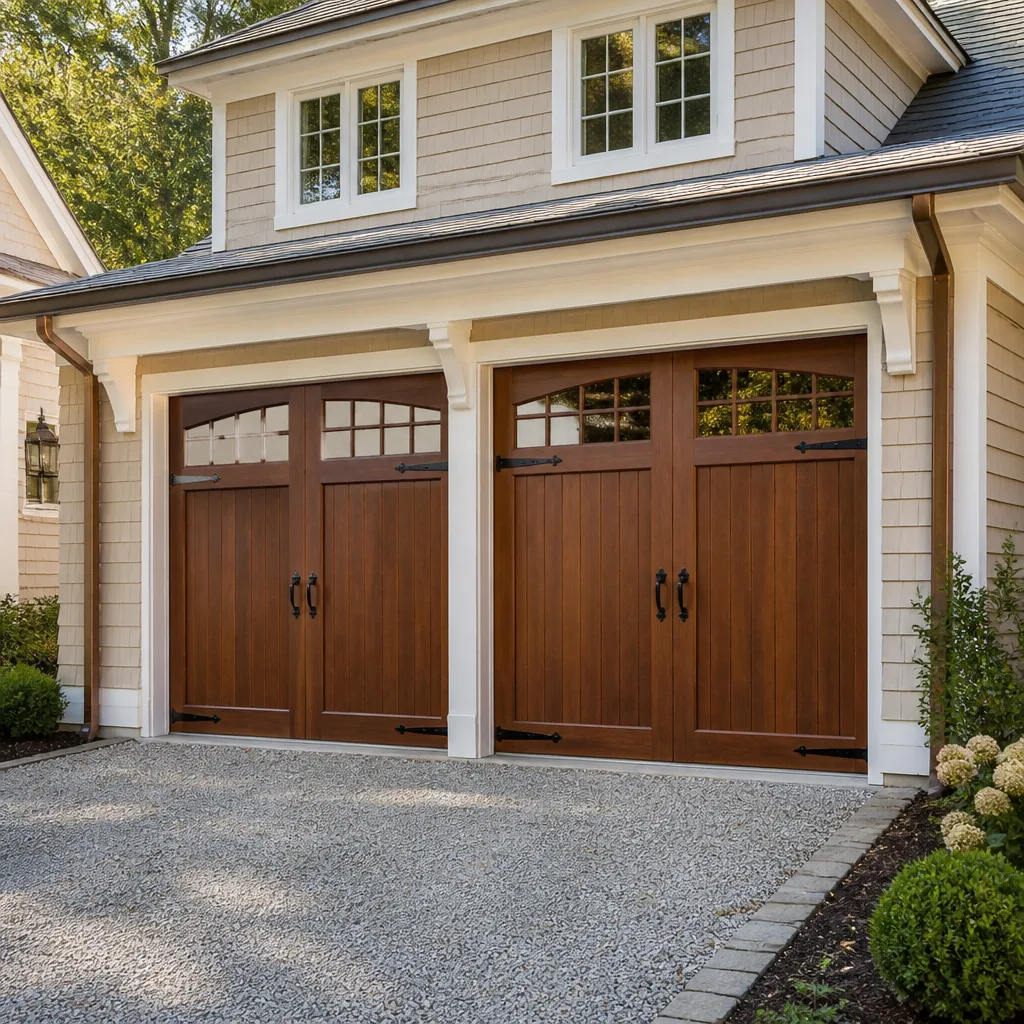 Carriage house
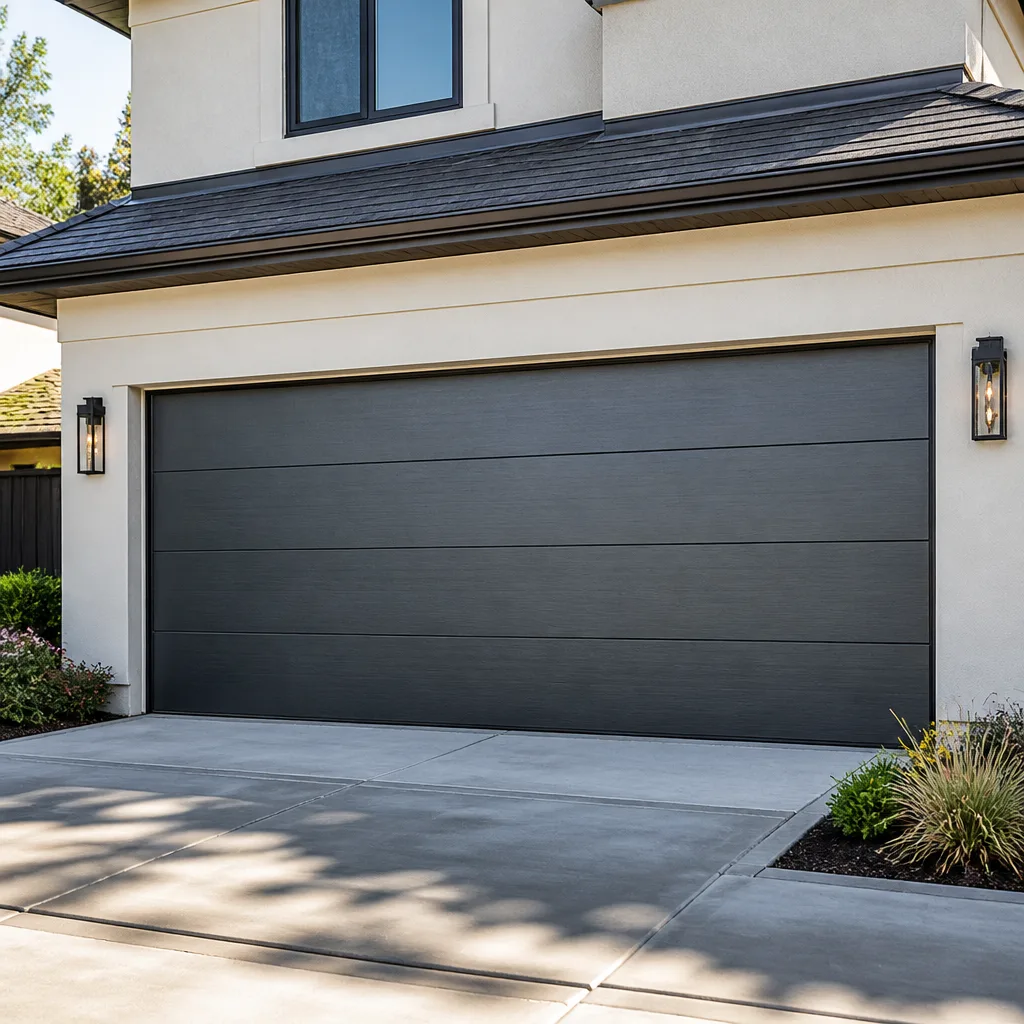 Modern flush
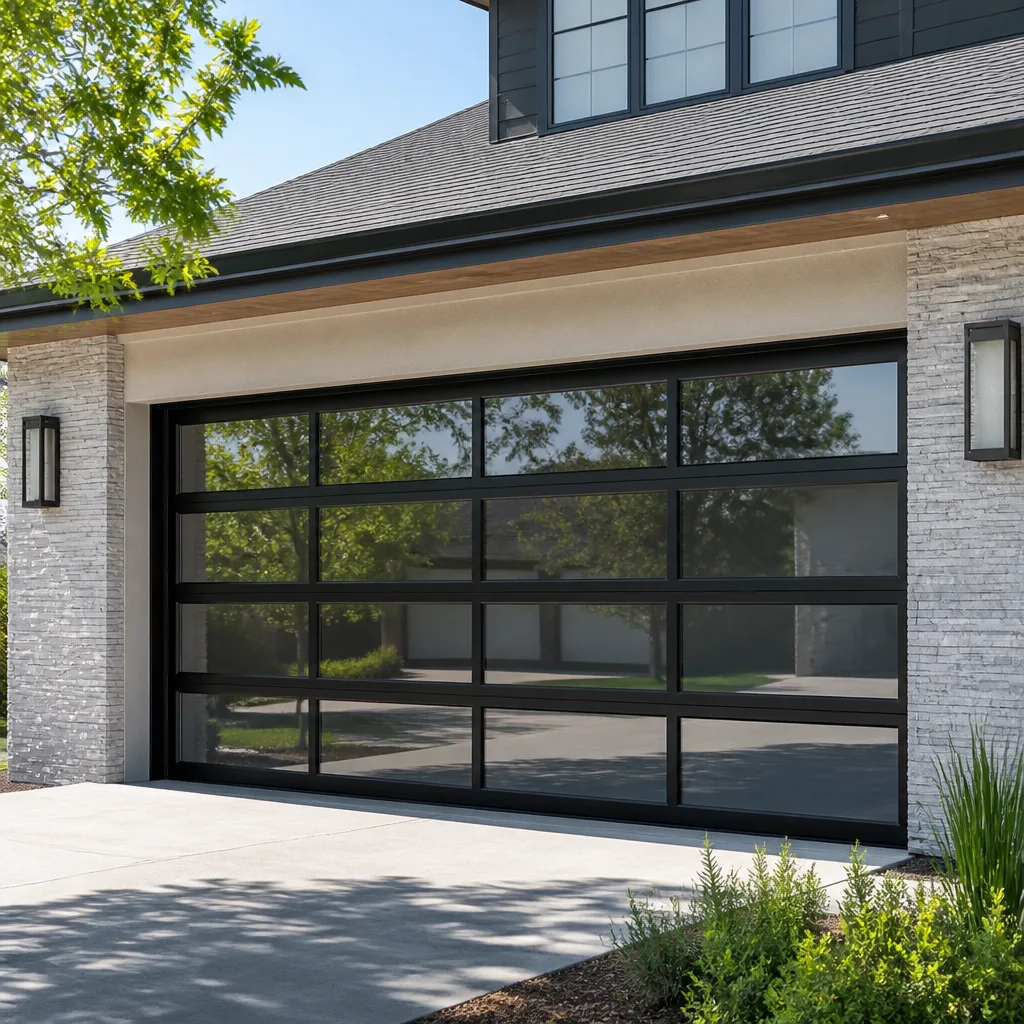 Full-view glass
 LiftMaster openers
 Chamberlain openers
Full 25-point door and opener safety check with every visit - springs, cables, rollers, tracks, and your LiftMaster or Chamberlain opener included
You get a price before we start. It does not change when the pro arrives.
Get your free estimateGarage Door Repair Maintenance Checklist for Lower East Side Homeowners
Most garage doors on the Lower East Side don’t wear out because of age or brand. They wear out because nobody lubricates the hardware that’s being hammered every day by vibration from street traffic and delivery trucks pulling up three feet from the door. A checklist written for a suburban driveway will tell you to oil things twice a year and call it done. That schedule doesn’t fit a street-facing door in a dense, walkable neighborhood where the door shares a wall with the sidewalk and the temperature swings from subway-vent heat to winter cold. What follows is a maintenance plan built around those conditions: what to check monthly, how to test a door on a slab that isn’t level, when urban grit shortens your lubrication interval, and the one annual task most homeowners skip that quietly voids a manufacturer warranty. Work through it and you’ll spend less on repairs and catch failures before they strand you.
Quick Answer
A working maintenance checklist for a Lower East Side garage door means three things: a monthly visual inspection of rust, seals and cables; lubrication every two to three months instead of the twice-a-year schedule most manuals suggest, because urban grit and traffic vibration break down lubricant faster; and an annual spring tension and balance check by a trained technician. Balance testing you can do yourself. Spring adjustment you should not.
Styles & brands we work with
- Raised-panel steel
- Carriage house
- Modern flush
- Full-view glass
- LiftMaster openers
- Chamberlain openers
Table of Contents
- The Monthly Visual Inspection for Street-Facing Doors
- How to Test Door Balance on a Slab That Isn’t Level
- Lubrication Intervals for Urban Grit and Temperature Swings
- Spotting Vibration Damage from Traffic and Construction
- The Annual Task Most Homeowners Skip: Spring Tension Verification
- Weather Seals, Bottom Panels and the Rust Creep Nobody Notices
- Opener and Safety-Reverse Checks You Can Run Yourself
- A Simple Maintenance Calendar for the Year
The Monthly Visual Inspection for Street-Facing Doors
A monthly walk-around takes about four minutes and catches the three failures that cost the most to fix late: rust at the bottom panel corners, a compressed weather seal, and a fraying cable near the drums. If you own or manage a street-facing door on the Lower East Side, this is the highest-value habit on the whole list. Street-facing doors take splash from rain running off the sidewalk, grit kicked up by passing vehicles, and constant low-grade vibration. None of that shows up as an obvious problem until it’s expensive.
Here’s what to look at each month:
- Bottom panel corners. Run your hand along the inside bottom edge. Rust starts where water sits, usually the corners, and spreads under the paint. Catch it as surface rust and it’s a cleaning and touch-up job. Let it pit through and you’re replacing a panel.
- Weather seal compression. Look at the rubber or vinyl seal along the bottom. It should press against the ground with no gaps when the door is closed. A flattened seal lets in water, grit and cold air, and it also throws off the door’s close.
- Cable condition near the drums. With the door closed, look at the cables that run up the sides to the drums at the top. Frayed strands, kinks or a cable sitting unevenly in its drum are warning signs. Don’t touch a cable under tension. Note it and call.
- Hinge and roller wear. Wobbly rollers and loose hinge screws show up first as a door that rattles when it moves.
- Panel alignment. Stand back and look at the door closed. A panel that’s out of line usually means a track or hinge problem underneath.
A dense neighborhood has more foot traffic, more deliveries and more people leaning on or bumping a street-facing door than a driveway door ever sees. That’s why the monthly check matters more here than the seasonal one most guides recommend. Four minutes now beats a snapped cable later.
How to Test Door Balance on a Slab That Isn’t Level
Balance testing tells you whether your springs are carrying the door’s weight or whether the opener is doing work it was never built for. On an uneven slab, which is common in older Lower East Side buildings, you adjust the test rather than skip it. The idea is simple: disconnect the opener, lift the door by hand to about halfway, and see if it stays put. A balanced door holds its position. A door that slides down on its own has weak springs. A door that wants to rise has springs that are too tight.
The slab complicates it. If the floor isn’t level, the door may sit slightly off and give you a false read, so here’s a method that accounts for it:
- Close the door and pull the opener’s manual release cord to disconnect it. The door is now on its springs alone.
- Lift the door by hand slowly to about waist height and let go gently. Don’t force it.
- Watch what it does. If it stays, you’re balanced. If it drifts down, the springs are losing tension. If it drifts up, they’re overtightened.
- Repeat the test at a second height, around shoulder level, to confirm the read. A consistent result at two heights means the slab’s slope isn’t skewing it.
- Reconnect the opener only after the door has settled back down under control.
If the door drifts in one direction both times, the springs need attention. Never adjust the springs yourself. The torsion springs above the door and the extension springs along the sides are under extreme tension and can cause serious injury if they’re released wrong. Balance testing is safe. Spring adjustment is a job for a trained technician. If you’d rather not test it yourself, we can check balance and springs during a service visit, and that’s usually where a garage door repair call starts.
Lubrication Intervals for Urban Grit and Temperature Swings
Most garage door manuals suggest lubricating twice a year. On the Lower East Side, cut that to every two to three months. The reason is grit and temperature. A street-facing door collects fine dust and road grit on its hinges, rollers and tracks, and that grit grinds lubricant into a paste that does more harm than good. Add the temperature swings of a neighborhood where subway heat vents into the street and winter cold follows, and you get constant expansion and contraction that thins lubricant faster than a stable climate would.
What to lubricate, and with what:
- Hinges and rollers. A garage door lubricant or white lithium grease. A few drops per hinge pivot, one short spray per roller stem. Not the roller wheel itself, just the stem and bearing.
- Track. Wipe the track clean with a dry cloth first. Grit accumulates in the channel, and lubricant on top of grit is worse than no lubricant. Then a light spray along the inside of the track.
- Springs. A light coat on the spring coils is fine to reduce squeal. Never get your hands near a torsion spring to do it. Use the spray straw from a safe distance, and only on extension springs you can reach without reaching into the coil.
- Lock and handle. If your door has a manual lock, a graphite or silicone spray keeps it working.
A word on what not to use: skip heavy grease and skip WD-40 as a long-term lubricant. Heavy grease traps grit. WD-40 is a solvent, not a lasting lubricant, and it will leave the moving parts dry once it evaporates. Use a product made for garage doors.
Your cue to lubricate isn’t just the calendar. If the door starts sounding louder or a hinge squeaks, it’s telling you the interval ran short. In a busy neighborhood that happens faster than the manual predicts. If the door is a Wayne Dalton or Genie model with sealed bearing rollers, those rarely need lubricant on the roller itself, but the hinges and track still do.
Spotting Vibration Damage from Traffic and Construction
Vibration from nearby traffic and construction loosens hardware faster than normal open-and-close cycles ever would. A garage door that opens twice a day shouldn’t have loose bolts after a few months. A door on a street where trucks idle, deliveries unload and buildings get renovated will. The vibration travels through the slab and the wall and works screws and bolts loose one turn at a time. You won’t notice until something rattles or a bracket shifts.
What to check, and how often:
- Hinge screws. Once a month, check that the screws holding each hinge are snug. A loose hinge lets the roller wander and wears the track.
- Track brackets. The brackets that hold the vertical and horizontal track to the wall should be tight. Wobble here means the door is riding crooked.
- Opener mounting. The bolts holding the opener to the ceiling or header should be firm. A vibrating opener is a loud opener, and it strains the motor.
- Lift cables and drums. Vibration can shift a cable out of its drum groove. Look at the drums at the top of the door each month for a cable that’s climbing out of its channel.
If a building goes up or comes down near you, expect the hardware to loosen a little faster for a while. A screwdriver check after construction wraps up is worth the ten minutes. And here’s the thing worth knowing: a door that suddenly starts rattling or running rough after months of quiet is usually a loose-hardware or worn-roller problem, not a motor failure. Catching it early turns a big repair into a small one.
The Annual Task Most Homeowners Skip: Spring Tension Verification
Spring tension verification is the one annual task most homeowners skip, and it’s the one that matters most for warranty coverage. Springs do the heavy lifting on every garage door. They’re under extreme tension, they weaken gradually, and a weakening spring forces the opener to work harder than it should. Manufacturers expect springs to be checked, and a door run for years on weakening springs can stress the opener and the door in ways that put a warranty claim in question. That’s the part nobody tells you.
You can’t verify spring tension by feel, and you shouldn’t try. It’s a technician job, for a specific reason: the springs above the door and along the sides store enough energy to cause serious injury if they’re handled wrong. What you can do is know the signs that it’s time to have them checked:
- Your balance test (above) shows the door drifting down at one or both heights.
- The door feels heavy when you lift it by hand, or the opener strains to lift it.
- The door moves in jerks rather than smoothly.
- You hear a loud bang from the garage and the door won’t lift. That’s often a spring that’s broken, and it’s a stop-everything call.
- The door has been in place for years without a spring check. We recommend an annual one.
When a spring does go, it usually goes as a pair. On most doors the two springs are matched and wear together, so replacing one and leaving the other is a short-term fix that leads to a second breakdown soon after. That’s why spring repair is priced per spring: a single spring replacement and a matched-pair replacement are two different jobs, and the pair costs about twice the single. Our technicians have up to 13 years of experience with spring work, which is one of the most hazardous services in this trade. If you want it checked before it fails, that’s a garage door repair visit worth scheduling.
Weather Seals, Bottom Panels and the Rust Creep Nobody Notices
Weather seals and bottom panels fail quietly, and by the time the failure is obvious the repair is bigger than it needed to be. The bottom seal is the first line against water and grit. When it compresses flat or tears, water runs under the door, sits against the bottom panel, and starts the rust creep that eats corners from the inside out. Nobody notices until the paint bubbles. On a Lower East Side door, where the base of the door meets a sidewalk that’s been there for decades and slopes however it slopes, the seal takes real abuse.
What to watch:
- Seal compression. Close the door and look for daylight or gaps along the bottom. A seal that’s flattened or torn needs replacing. It’s a low-cost part and one of the easiest fixes on the door.
- Rust creep at the bottom panel corners. Check inside and out. Surface rust can be sanded and touched up. Rust that has pitted through the steel means the panel is done.
- Side and top seals. The seals around the door’s sides and top keep weather and pests out. Check that they’re pliable, not cracked.
- Bottom bracket. The bracket the bottom seal attaches to should be solid. If it’s rusted through, the whole bottom edge is compromised.
Rust is a slow problem right up until it’s a fast one. A steel door like a Clopay or Amarr model with a factory finish will resist rust well as long as the finish is intact. Once it’s chipped or scratched through to bare metal, water gets in and the clock starts. Touch up bare spots when you find them.
Opener and Safety-Reverse Checks You Can Run Yourself
The safety-reverse test is the single most important check you can run yourself, and it should be done monthly. Every opener made in recent decades has a safety reverse: if the door meets an obstruction while closing, it should reverse. If it doesn’t, that’s a real hazard. The test is quick, and it’s the one owner check we’d never let a homeowner skip.
- With the door open, place a firm object like a roll of paper towels or a piece of wood flat on the floor under the door.
- Close the door using the opener or wall control. When the door meets the object, it should reverse back open.
- If it doesn’t reverse, stop using the opener and have it checked. Don’t rely on the door in the meantime.
- Test the photo-eye sensors too: with the door closing, pass an object through the beam at the base. The door should reverse.
Beyond the safety reverse, listen to the opener. A grinding or rattling noise usually points to worn gears or a loose chain or belt. A door that won’t close all the way, or won’t open at all, may be a sensor or a control-board issue rather than the door itself. Smart-home-compatible openers like a LiftMaster, Chamberlain, Genie or Craftsman unit have their own diagnostics, and the brand matters for parts and repair. We repair openers from all of those, so you don’t have to guess which specialist to call. The garage door opener repair work we do covers established brands and connected systems alike.
One caution: if a door won’t close because something’s obstructed, don’t force it. The door can be off its track, and forcing it can bend panels and break rollers. Call it in.
A Simple Maintenance Calendar for the Year
Here’s how the whole checklist fits into a year without becoming a chore. The idea is a light monthly loop, a quarterly lubrication, and an annual professional check. Everything else is on an as-needed basis.
- Monthly (about four minutes): Walk the door – rust at bottom corners, seal compression, cables at the drums, loose hinge screws, track brackets, opener mounting. Run the safety-reverse and photo-eye tests.
- Every two to three months: Lubricate hinges, roller stems, track and lock. Wipe the track before you lubricate it.
- Twice a year: Balance test the door. Check side and top seals.
- After nearby construction wraps up: A screwdriver check of hinges, brackets and opener bolts.
- Annually: Professional spring tension and balance check. If you’ve never had one, this is the year to start.
If a new door is on your mind rather than maintenance, worth knowing: a maintenance routine keeps an existing door alive, but a worn-out door is a worn-out door. When the bottom panel is rusting through and the springs have failed twice, a garage door installation is the smarter spend. We do both repairs and new installs, so you don’t get handed off. The same team that keeps your current door running can measure you for a new one when the time comes.
Common Mistakes to Avoid
- Lubricating on the twice-a-year schedule from the manual. Those intervals are written for a sheltered driveway, not a street-facing Lower East Side door. Urban grit and temperature swings break down lubricant faster. Every two to three months is closer to right here.
- Greasing the track like a machine part. A thick coat of grease on the track traps grit and turns the channel into sandpaper. Wipe the track dry first, then a light spray.
- Adjusting the springs yourself. This is the mistake that sends people to the hospital. Springs are under extreme tension, and a wrong move can release that energy. Balance test all you want; leave spring adjustment to a technician.
- Ignoring the bottom corners. Rust starts at the bottom panel corners where water sits, and it spreads under the paint where you can’t see it. Check inside and out, not just the outside face.
- Skipping the annual spring check. Springs weaken slowly, and a door run for years on weak springs strains the opener and the door. That’s the check most homeowners skip and the one that matters most.
- Assuming a loud, rough-running door means a dead opener. Loose hinge screws, a worn roller or a slightly off-track door make the opener sound and act worse than it is. Check the hardware before you price a motor.
- Forcing a stuck door. If a door won’t close or is off its track, forcing it bends panels and breaks rollers. Stop and call.
See the difference
 Before
 After
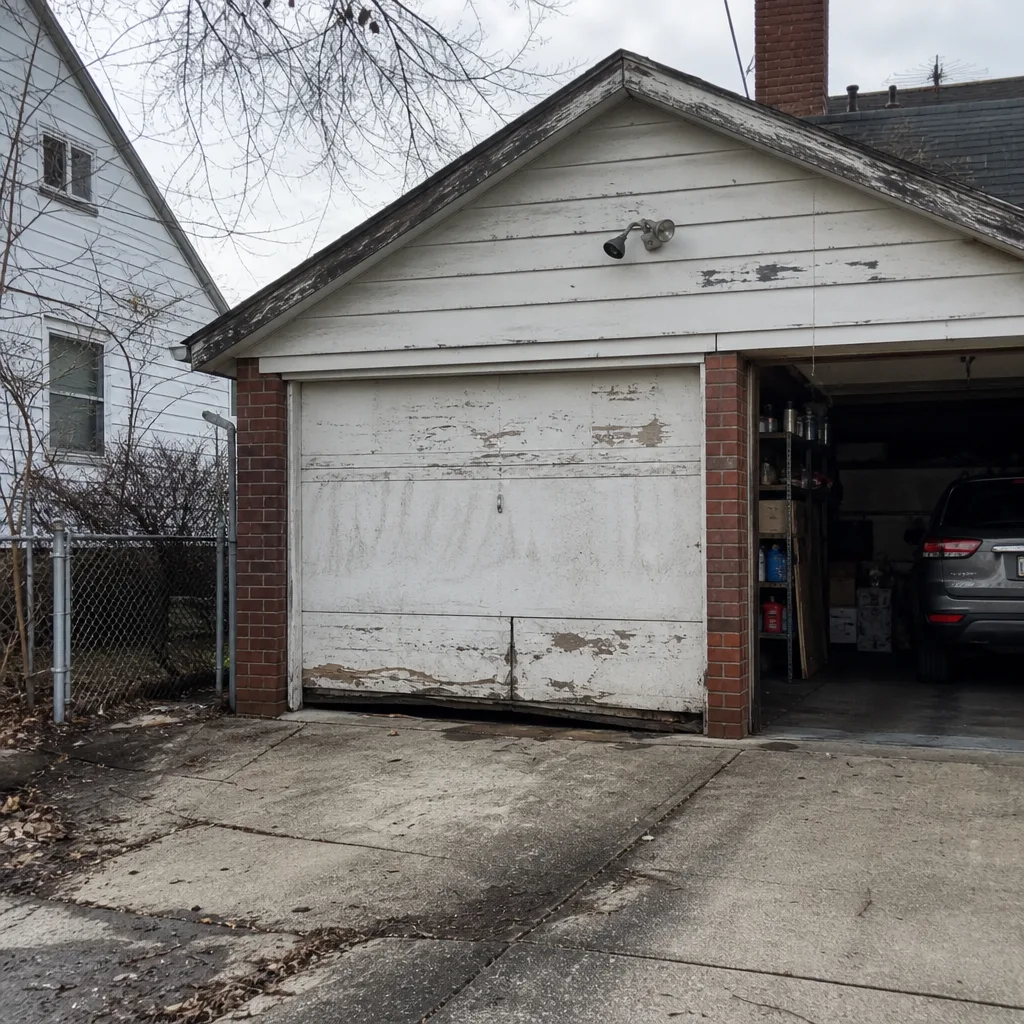 Before
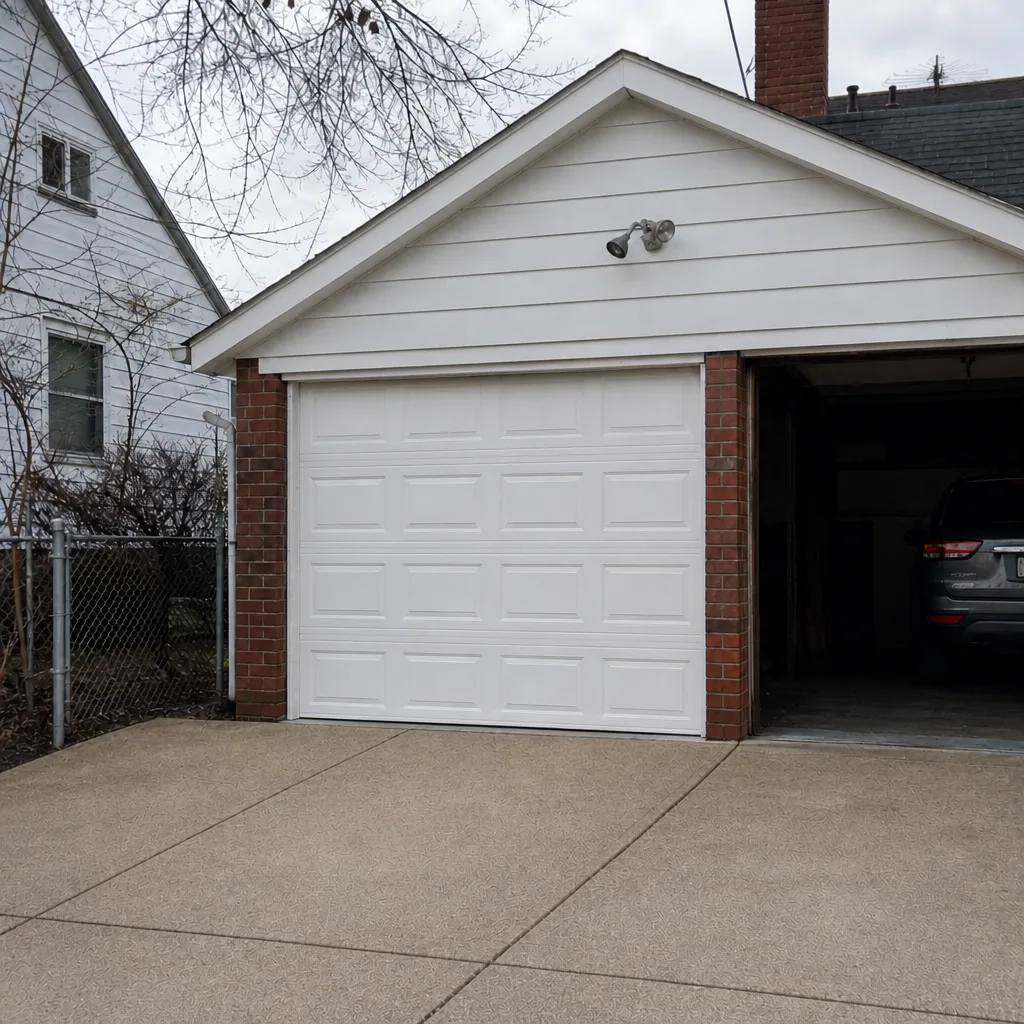 After
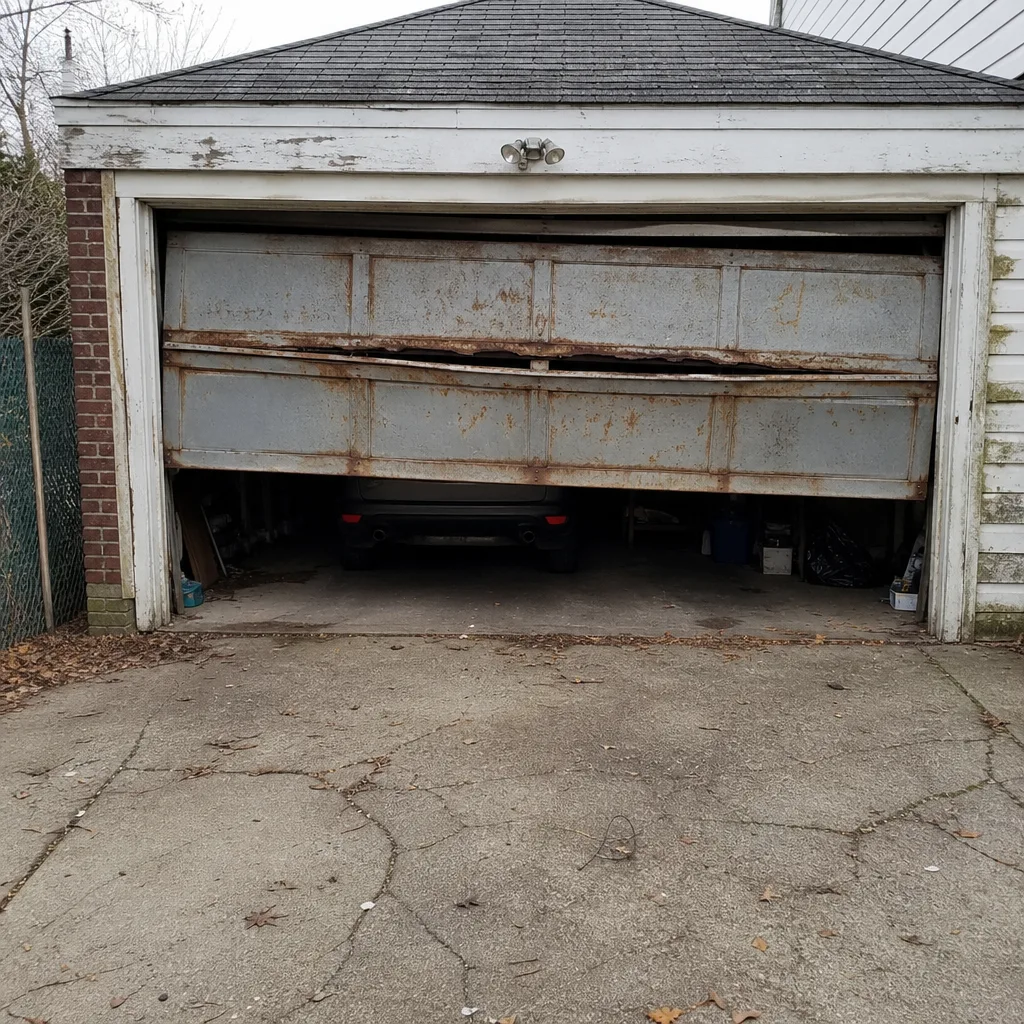 Before
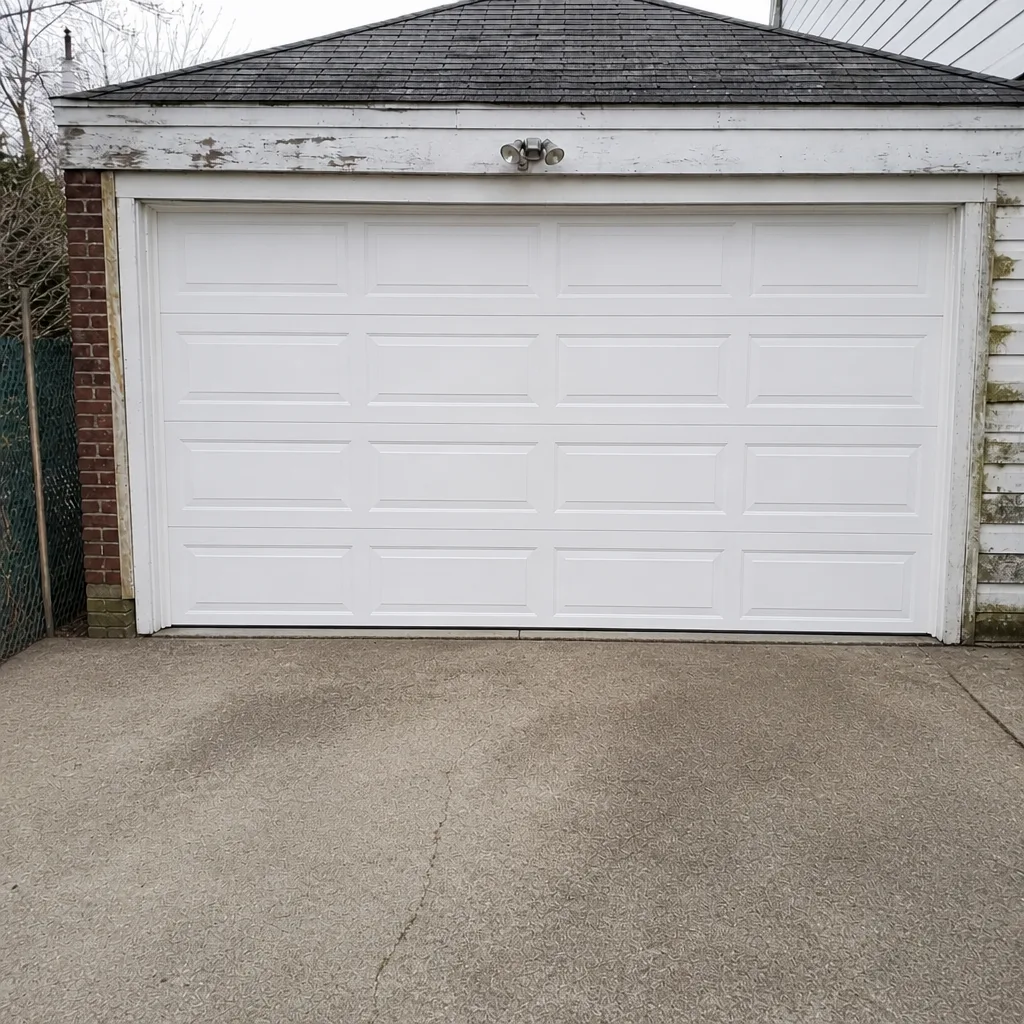 After
When to Call a Professional
Some of this checklist is yours to run; some of it belongs to a technician. Call us when a spring has snapped, when the door has come off its track, when a cable is frayed or climbing out of its drum, or when the door won’t close and you can’t see why. If the safety reverse fails, that’s a call. If the door is running rough after you’ve checked the hardware, or if the balance test shows a door drifting on its own, those are jobs for a trained hand. Springs, openers and panel damage are all work we do, and getting it fixed right the first visit saves you a second round. Garage Door Repair Lower East Side offers free estimates in Lower East Side – call (866) 937-7379. We answer 24/7. Fast dispatch from 7am to 7pm, Sunday through Friday.
Frequently Asked Questions
Monthly for the visual inspection and safety-reverse check, every two to three months for lubrication, twice a year for the balance test, and once a year for a professional spring check. The faster lubrication interval is the main difference from what a manufacturer’s manual tells you, and it’s driven by urban grit and the temperature swings that come with a street-facing door in a dense neighborhood. The rest of the schedule fits any door, but on a Lower East Side door the monthly loop earns its keep.
You can lubricate hinges, roller stems, the track and a manual lock yourself with a garage door lubricant, and it’s worth doing. What you shouldn’t do is reach into or adjust the springs; those are under extreme tension and cause serious injuries when handled wrong. Use the spray straw from a safe distance if you’re coating the coils at all, and leave any spring adjustment to a trained technician. If you’re not sure what needs lubricant and what doesn’t, a service visit is the safe call.
A loud bang from the garage followed by a door that won’t lift is the classic sign, and a door that feels heavy or moves in jerks is the slower version. Your balance test will confirm it: a door that drifts down on its own when disconnected from the opener has springs that are failing. Never try to open or fix a door with a snapped spring. Call it in and we’ll assess it. Springs are usually replaced as a matched pair because both wear together.
The bottom panel sits where water and grit collect, and a worn weather seal lets water run under the door and sit against the steel. That’s why rust starts at the bottom corners and spreads under the paint from the inside. Replace a flattened or torn bottom seal when you find one, and touch up bare metal before it pits. If you see rust creeping through the corners inside and out, the panel may be past touch-up.
A door that suddenly rattles or runs rough after months of quiet is usually suffering from loose hardware. Vibration from trucks and nearby construction works screws and bolts loose faster than normal use ever would. Check hinge screws, track brackets and opener mounting bolts a few times a year, and once more after any nearby construction wraps up. A ten-minute screwdriver pass catches most of it.
You need a professional. You can’t verify spring tension by feel, and the springs store enough energy to cause serious injury. A technician checks tension and balance safely and tells you whether the springs are carrying the door’s weight or the opener is doing work it shouldn’t. That annual check is the one most homeowners skip, and it’s the one that matters most for keeping the opener and door healthy. Call (866) 937-7379 for an exact quote – estimates are free.
The Bottom Line
A maintenance checklist built for Lower East Side conditions looks different from a generic one, and that difference is where the savings come from. Lube every two to three months, not twice a year, because grit and temperature thin it faster. Check rust at the bottom corners and your seal compression monthly, because that’s where water attacks. Run the balance and safety-reverse tests yourself. Leave spring tension to a technician, and do it once a year, because that’s the check that keeps the whole system – and your warranty – healthy. Catch failures early and you’ll spend less on repairs and get more years out of the door. When a job is beyond a screwdriver and a spray can, Garage Door Repair Lower East Side handles springs, openers, panels and full doors, and we answer 24/7 on (866) 937-7379. Fast dispatch from 7am to 7pm, Sunday through Friday, with a free estimate on every visit.
Written by the team at Garage Door Repair Lower East Side.